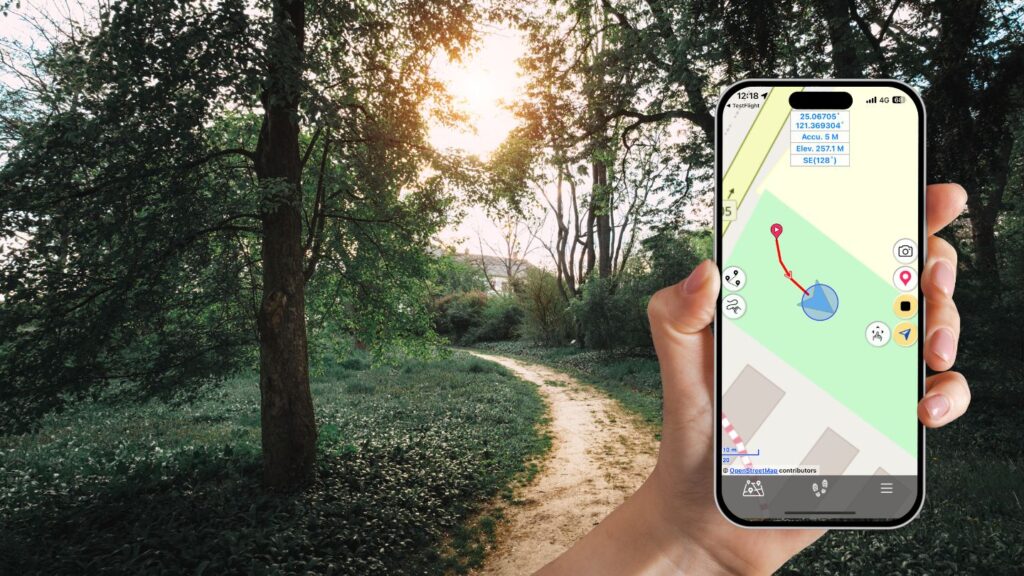
Embarking on a new hiking adventure is always thrilling, and with the Hiking Logger app, you can capture every moment of your journey. Whether you’re meandering through serene forests or scaling rugged terrains, the app ensures you never miss a step. Here’s a step-by-step guide on how to use the “Tracking” function to record and enrich your hiking experience.
Step 1: Initiating Your Tracking Session
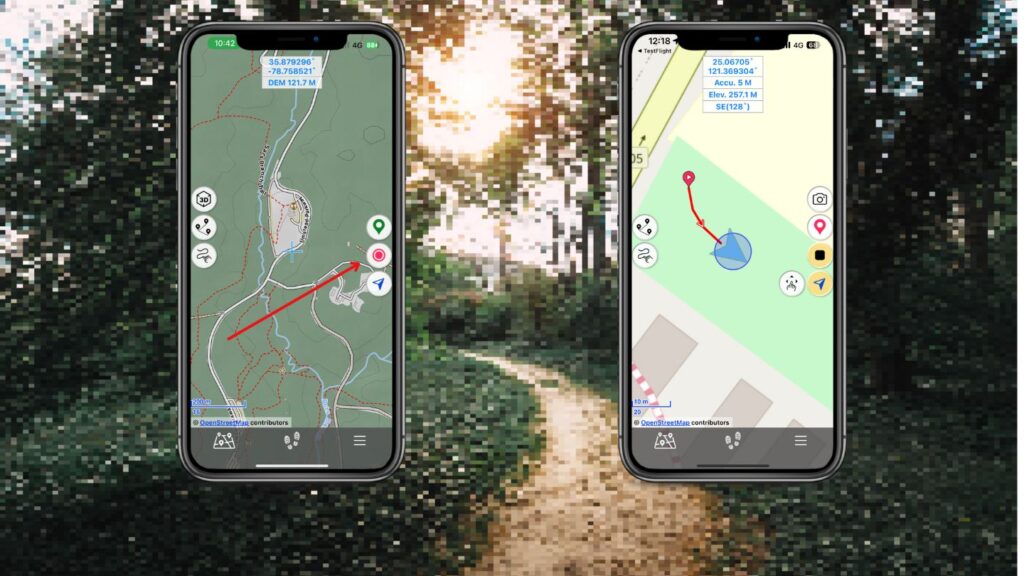
- Launch Hiking Logger: Open the app and tap the Tracking icon to begin recording your track.
- Naming Your Track: Assign a unique name to your track, perhaps based on the location or trail you’re exploring.
- Engage with the Map View: Once you’ve named and initiated the tracking, the map view will dynamically display the path you’re traversing.
- Information Window Insights: This feature provides real-time data, including:
- GPS Accuracy (Accu.): For instance, “5 M” signifies that your tracking is accurate within a 5-meter radius of your actual location.
- Elevation (Elev.): Displays the altitude of your current position.
- Direction: Indicates the direction you’re heading, such as “N” for North.
Step 2: Enhancing Your Track with Waypoints
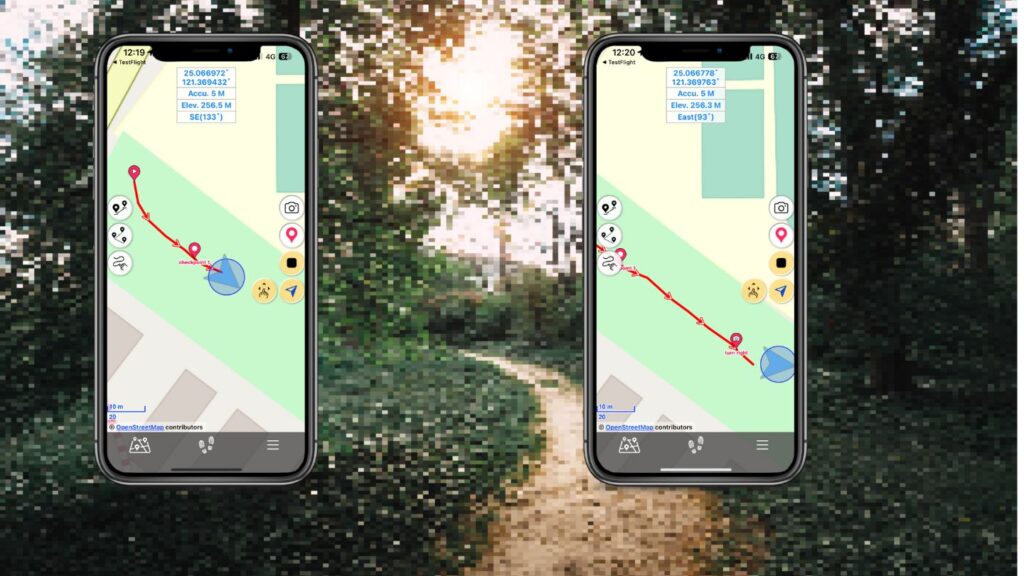
- Marking Significant Points: As you hike, you can set waypoints to highlight notable locations or turns on your route. Use the red position icon.
- Naming Waypoints: Assign descriptive names to these points for easy reference, like “Right Turn” at a significant junction.
- Enriching Waypoints: Enhance your waypoints with images (camera icon or CAM within the waypoint screen) or audio notes (REC within the Waypoint Screen), offering a richer recall of your journey.
Step 3: Interactive Map Exploration
Engage with Moving Map Mode: During breaks or moments of rest, tap the “Moving Map Mode” icon. This allows you to freely explore the map without it auto-centering on your current location.
Step 4: Concluding Your Tracking Session
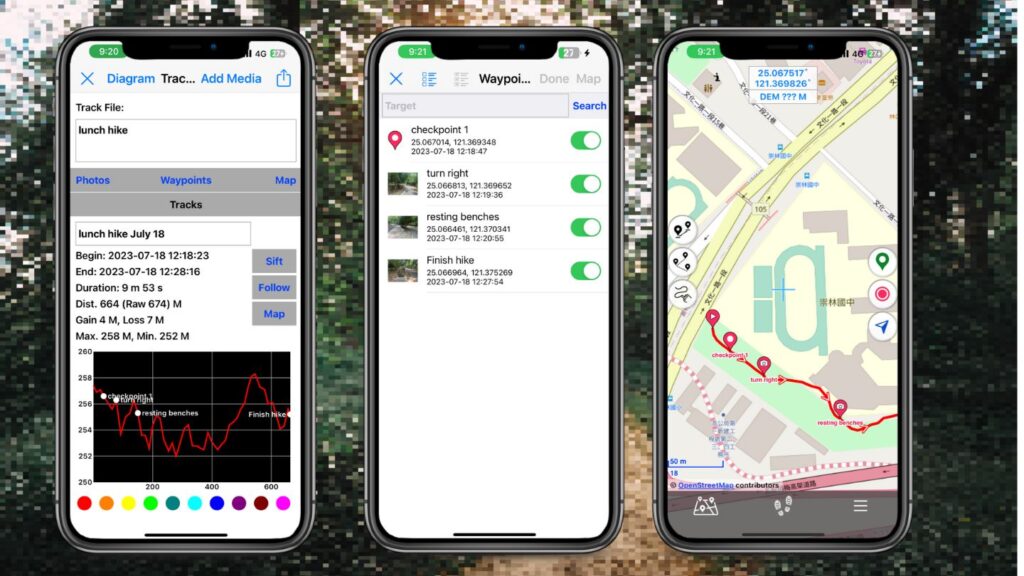
- Ending Your Session: Once your hike is complete, tap the “Tracking” icon again to finish recording.
- Reviewing Your Journey: Post-hike, delve into the details of your track. Examine metrics like time, distance, elevation gain, and the elevation profile. Your added checkpoints, complete with their descriptors, will also be available for review.
- Additional Insights: Use the Photos, Waypoints, and Map links to revisit the media you’ve added, scrutinize individual checkpoints, or view the entire track on the map.
Step 5: Revisit or Share Your Adventure
- Following Your Track: If you’re revisiting the same trail, you can easily use your recorded track as a guide.
- Sharing Your Journey: Proud of the trek you’ve completed? Share your track with friends or fellow hiking enthusiasts.
Conclusion
The Hiking Logger app is more than just a tracking tool; it’s your digital companion on every adventure. With its intuitive features, you can not only record but also relive and share every memorable moment of your hikes. So, the next time you lace up your hiking boots, ensure Hiking Logger is on your checklist. Happy hiking!
